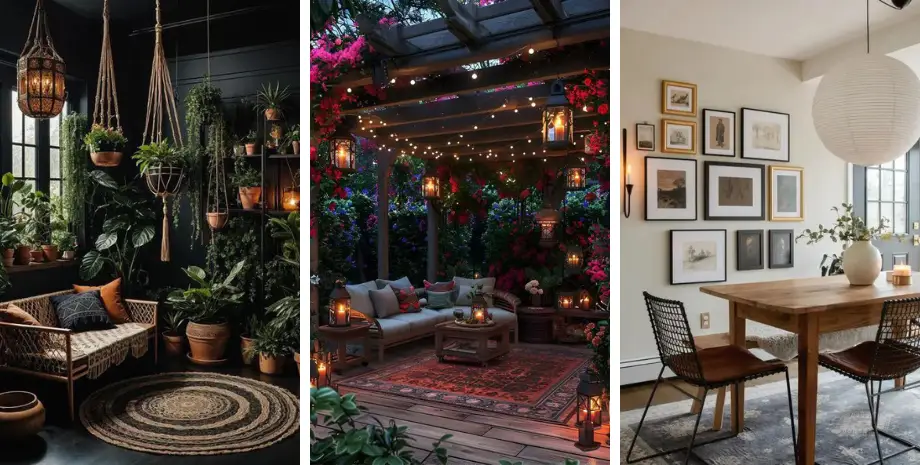
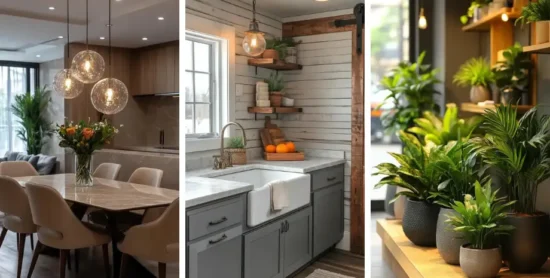
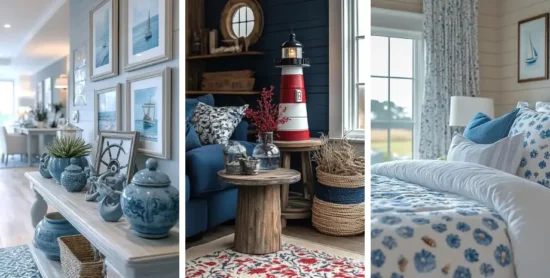
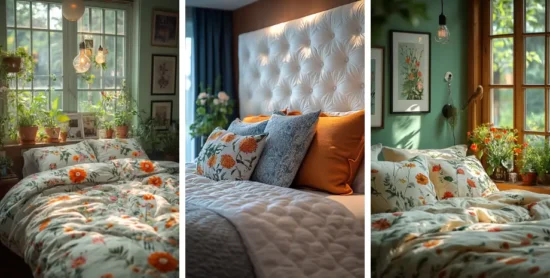
Transforming your home doesn’t have to come with a hefty price tag. With a bit of creativity and ingenuity, you can enhance your living spaces on a budget. This guide offers ten budget-friendly home decor design ideas that can help you refresh your interiors without breaking the bank. Whether you’re updating a single room or giving your entire home a new look, these practical tips will help you achieve a stylish and inviting atmosphere.
Explore simple yet effective changes like DIY wall art, upcycling furniture, and incorporating indoor plants. Discover how throw pillows, decorative storage, and accent walls can breathe new life into your space. These ideas are designed to provide maximum impact while keeping costs low, allowing you to personalize your home in a way that reflects your unique style.
By implementing these budget-friendly solutions, you can create a beautifully decorated home that feels both comfortable and elegant. Dive into these creative ideas and enjoy the process of making your home a reflection of your personal taste.
1. DIY Wall Art:
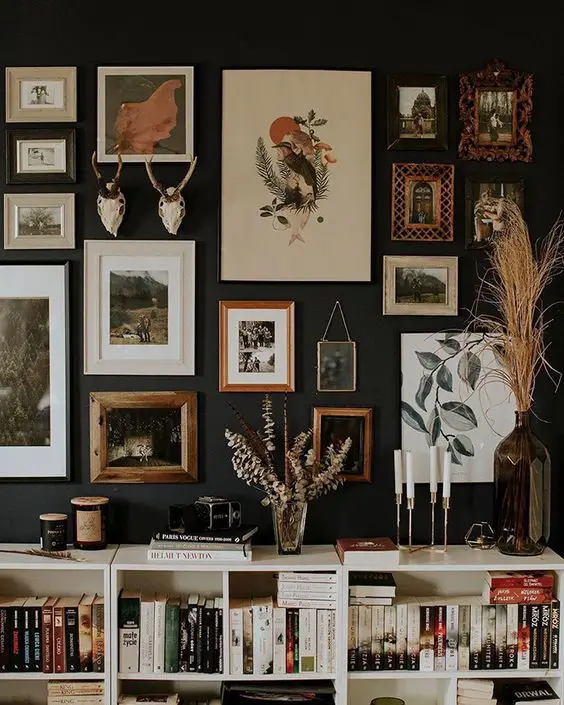
Image :- Pinterest
Creating DIY wall art is a fantastic way to personalize your space and make it uniquely yours. Here are some steps and tips to get started:
Materials Needed:
- Canvas or Art Paper: Choose a size that fits your space. You can find inexpensive canvases at craft stores or online.
- Paints: Acrylic paints are affordable and versatile. You can also use watercolor or even leftover house paint for a more textured effect.
- Brushes: Different sizes and types of brushes will help you achieve various effects.
- Frame: For a polished look, consider framing your artwork. You can find budget-friendly frames at discount stores or thrift shops.
- Printable Art: Search for free or inexpensive printables online. These can be printed at home or at a local print shop.
Steps to Create DIY Wall Art:
- Choose Your Design: Decide on a theme or design for your artwork. It could be abstract, nature-inspired, geometric, or even a quote.
- Prepare Your Canvas: If using a blank canvas, you might want to start with a base color or texture. Apply a base coat and let it dry completely.
- Paint Your Artwork: Start painting your design. Use different techniques like blending, stippling, or layering to create texture and interest. Don’t be afraid to experiment!
- Let It Dry: Allow your artwork to dry thoroughly. This might take a few hours to a day, depending on the type of paint used.
- Frame Your Artwork: Once dry, place your artwork in a frame. This step can elevate the look and make it more polished.
- Hang and Enjoy: Position your framed artwork on the wall. Experiment with placement to find the best spot for visual impact.
Additional Tips:
- Try Mixed Media: Combine different materials, like adding fabric, paper cutouts, or even small objects to your canvas for a unique effect.
- Use Stencils: If you’re not confident in your freehand painting, use stencils for clean, consistent shapes and patterns.
- Personal Touches: Incorporate elements that reflect your personality or interests. Customizing your art makes it even more special.
Creating your own wall art can be a fun and rewarding project that adds a personal touch to your home decor!
2. Upcycled Furniture:
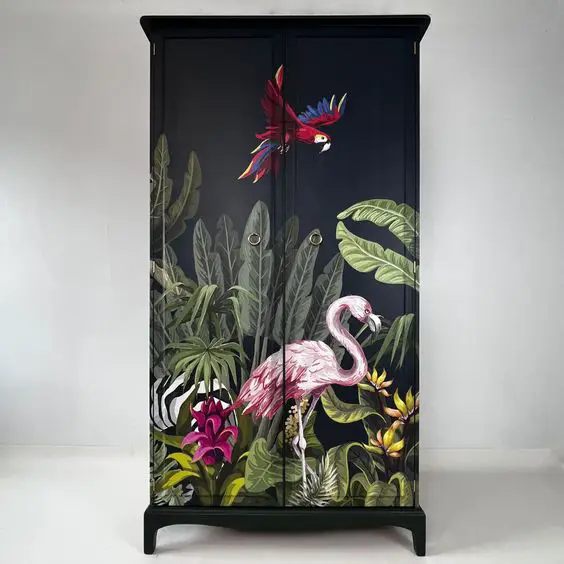
Image :- Pinterest
Upcycling furniture is a great way to refresh your space and save money. Here’s a guide to help you transform old pieces into stylish, new additions to your home:
Materials and Tools:
- Sandpaper or a Sanding Block: For smoothing surfaces and removing old finishes.
- Primer: Helps paint adhere better and provides a more even finish.
- Paint: Choose from chalk paint, acrylic paint, or spray paint depending on the look you want.
- Brushes and Rollers: For applying paint. Foam brushes work well for a smooth finish.
- New Hardware: Drawer pulls, knobs, and hinges can update the look of furniture.
- Wood Filler: For repairing scratches, dents, or holes.
- Clear Sealer or Topcoat: Protects the finish and adds durability.
- Drop Cloth: To protect your workspace from paint spills.
Steps to Upcycle Furniture:
- Clean and Prep: Thoroughly clean the furniture to remove dust and grime. If necessary, disassemble parts for easier handling.
- Sand the Surface: Lightly sand the furniture to remove any old finish and create a rough surface for the new paint to adhere to. Fill any dents or holes with wood filler and sand smooth once dry.
- Apply Primer: Apply a coat of primer to ensure even paint coverage. This is especially important if you’re painting over a dark color or a glossy surface.
- Paint: Apply your chosen paint in thin, even coats. Allow each coat to dry before applying the next one. For a smooth finish, use a foam brush or roller, and sand lightly between coats if needed.
- Add New Hardware: Replace old knobs, pulls, or hinges with new ones. This small update can make a big difference in the overall look.
- Seal the Paint: Once the paint is dry, apply a clear sealer or topcoat to protect the finish and enhance durability. This step is particularly important for furniture that will see heavy use.
- Reassemble and Style: Put any disassembled parts back together and place your upcycled furniture in its new spot. Consider adding decorative elements like new cushions, a fresh tablecloth, or a stylish lamp to complement the updated piece.
Additional Tips:
- Experiment with Techniques: Try techniques like distressing, stenciling, or adding patterns for a unique look.
- Choose the Right Paint: Chalk paint is popular for a matte, vintage look, while acrylic or latex paints are good for a smooth, glossy finish.
- Test Colors: Before committing to a color, test it on a small area or a sample board to see how it looks in your space.
- Stay Safe: Work in a well-ventilated area, especially when using spray paint or strong primers.
Upcycling furniture not only saves money but also gives your old pieces a new lease on life, adding character and charm to your home!
3. Indoor Plants:
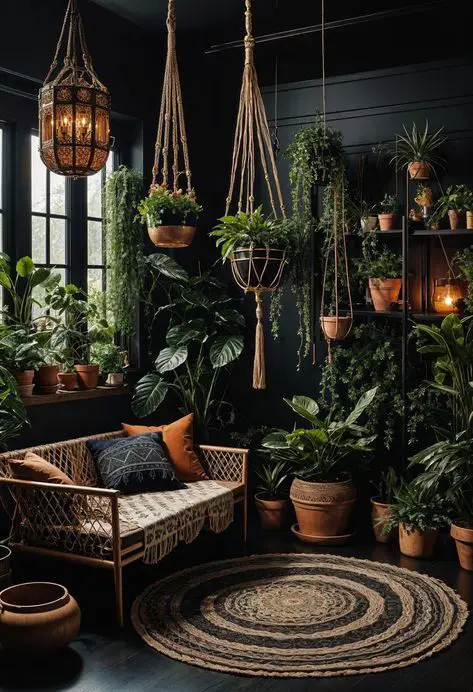
Image :- Pinterest
Indoor plants can really liven up a space and improve air quality. Here are some low-maintenance plants that are perfect for beginners and those with a busy lifestyle:
1. Succulents
- Why They’re Great: Succulents are drought-tolerant and require minimal watering. They come in a variety of shapes and sizes, making them versatile for any decor.
- Care: Place them in bright, indirect sunlight. Water them when the soil is completely dry.
2. Snake Plant (Sansevieria)
- Why It’s Great: Snake plants are known for their hardy nature and ability to thrive in low light conditions. They also help purify indoor air.
- Care: Water sparingly, allowing the soil to dry out between waterings. It prefers indirect light but can tolerate low light as well.
3. Pothos (Epipremnum aureum)
- Why It’s Great: Pothos is a trailing plant that’s very easy to care for and can grow in a variety of lighting conditions. It’s also great for hanging baskets or shelves.
- Care: Water when the top inch of soil feels dry. It can thrive in low to bright, indirect light.
4. ZZ Plant (Zamioculcas zamiifolia)
- Why It’s Great: ZZ plants are virtually indestructible and can survive with minimal light and infrequent watering.
- Care: Water when the soil is dry. It prefers bright, indirect light but can tolerate low light conditions.
5. Spider Plant (Chlorophytum comosum)
- Why It’s Great: Spider plants are resilient and can adapt to a range of conditions. They also produce “babies” or offsets that you can propagate.
- Care: Water when the soil is dry. They prefer bright, indirect light but can also handle lower light levels.
6. Peace Lily (Spathiphyllum)
- Why It’s Great: Peace lilies are known for their attractive white blooms and their ability to thrive in low light conditions. They also help filter indoor air.
- Care: Keep the soil moist but not waterlogged. Prefers low to bright, indirect light.
7. Aloe Vera
- Why It’s Great: Aloe vera is not only a low-maintenance plant but also has medicinal properties. It’s perfect for sunny spots.
- Care: Water infrequently, allowing the soil to dry out completely between waterings. Needs bright, indirect sunlight.
8. Philodendron
- Why It’s Great: Philodendrons are adaptable and can thrive in various light conditions. They’re also great for adding lush, green foliage to any room.
- Care: Water when the top inch of soil feels dry. They prefer bright, indirect light but can tolerate lower light.
9. Cast Iron Plant (Aspidistra elatior)
- Why It’s Great: As the name suggests, cast iron plants are tough and resilient, handling a range of conditions.
- Care: Water when the soil is dry. Prefers low to moderate light conditions.
10. Chinese Evergreen (Aglaonema)
- Why It’s Great: Chinese evergreen plants are easy to care for and adapt well to low light conditions. They come in various attractive patterns and colors.
- Care: Water when the soil is dry. Prefers low to medium, indirect light.
Additional Tips:
- Proper Pots: Ensure pots have drainage holes to prevent waterlogging and root rot.
- Regular Cleaning: Dust leaves regularly to keep them looking their best and ensure they can absorb light effectively.
- Rotate Plants: Occasionally rotate your plants to ensure they grow evenly.
Incorporating these easy-to-care-for plants can bring a refreshing touch of nature into your home with minimal effort!
4. Throw Pillows and Blankets:
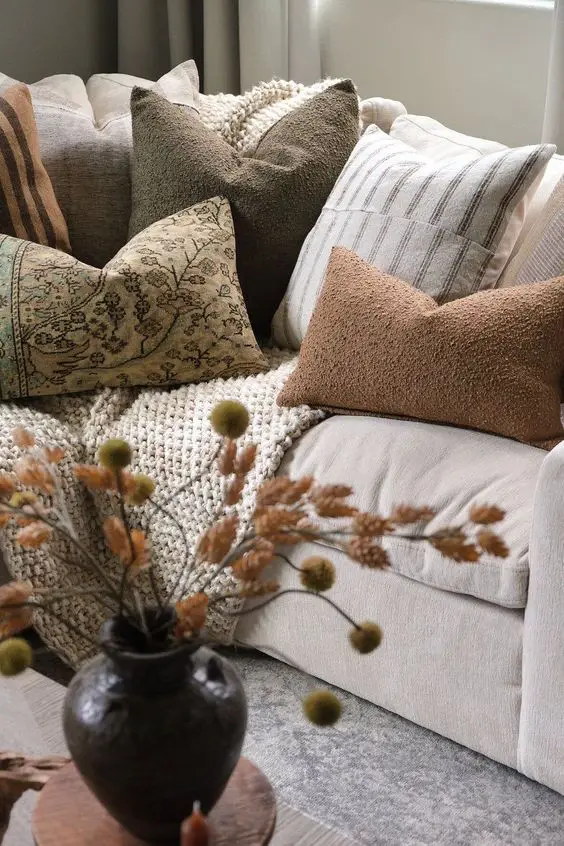
Image :- Pinterest
Updating your sofa or bed with new throw pillows and blankets is a quick and affordable way to refresh your space. Here’s how you can make the most of these decor elements:
1. Choose a Color Palette
- Complementary Colors: Select pillows and blankets in colors that complement or contrast with your existing decor. This can tie the room together and create a cohesive look.
- Seasonal Themes: Consider changing your palette with the seasons—soft pastels for spring, vibrant colors for summer, warm tones for fall, and cozy neutrals or rich hues for winter.
2. Mix Patterns and Textures
- Patterns: Combine different patterns like stripes, florals, and geometric designs for visual interest. Just make sure they coordinate in color to avoid clashing.
- Textures: Mix textures such as knitted throws, velvet pillows, and faux fur for a layered, cozy effect.
3. Layering Techniques
- Pillows: Start with a few larger, solid-colored pillows and layer smaller, patterned ones on top. This creates a dynamic and inviting look.
- Blankets: Drape a throw blanket over the back or arm of your sofa or bed. Fold or roll it neatly for a polished appearance, or let it cascade for a more relaxed vibe.
4. Play with Sizes and Shapes
- Pillow Sizes: Use a mix of sizes, such as large, square pillows and smaller, rectangular ones. This adds depth and variety to your arrangement.
- Blanket Sizes: Choose blankets that are large enough to be draped comfortably, or opt for smaller throws for a more compact look.
5. Seasonal and Thematic Updates
- Seasonal Changes: Swap out your throws and pillows to match seasonal changes. Light, airy fabrics for summer and heavier, warmer materials for winter.
- Themes: Update with themed decor for holidays or special occasions. Festive pillows and blankets can add a touch of celebration to your space.
6. DIY Options
- Custom Covers: Make or update your own pillow covers using fabric from craft stores or old textiles. It’s a fun way to personalize your decor.
- No-Sew Blankets: Create your own throw blankets with no-sew fleece or fabric options. Simple and budget-friendly!
7. Budget-Friendly Sources
- Discount Stores: Check out discount stores, thrift shops, or online marketplaces for affordable options.
- Sales and Clearance: Look for sales and clearance sections at home decor retailers for great deals on stylish pillows and blankets.
8. Care and Maintenance
- Cleaning: Regularly clean your pillows and blankets according to their care instructions to keep them looking fresh.
- Storage: Store off-season pillows and blankets in vacuum-sealed bags or under-bed storage to keep them dust-free.
By thoughtfully selecting and arranging throw pillows and blankets, you can instantly elevate the look and feel of your living space. It’s a simple and effective way to add comfort and style without a significant expense!
5. Gallery Wall:
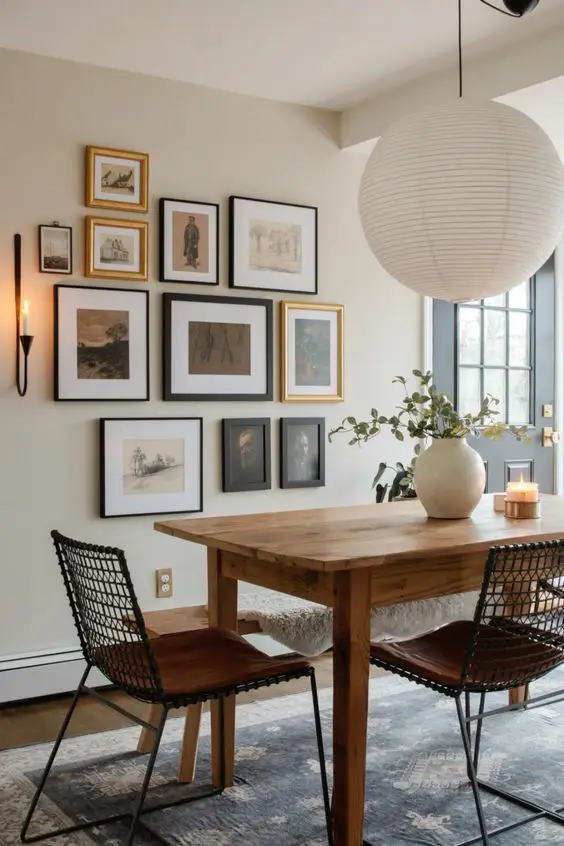
Image :- Pinterest
Creating a gallery wall is a fantastic way to showcase your personal style and add character to a blank wall. Here’s how to put together a cohesive and visually appealing gallery wall:
1. Plan Your Layout
- Choose a Theme: Decide on a theme or color scheme that complements the room. This could be a mix of personal photos, art prints, quotes, or a specific style like modern or vintage.
- Mock-Up: Use paper cutouts of the frame sizes and arrange them on the floor or wall using painter’s tape to visualize the layout before making it permanent.
2. Select Your Artwork and Frames
- Mix and Match: Combine different types of artwork, such as photos, prints, and decorative items. Vary the sizes and styles of frames for an eclectic look, or keep them uniform for a more cohesive appearance.
- Frame Choices: Choose frames that match the style of the room. You can opt for matching frames for a uniform look or mix different styles and finishes for added interest.
3. Arrange Your Pieces
- Central Anchor: Start with a central piece as the focal point. Arrange other pieces around it, building outward in a balanced way.
- Spacing: Maintain consistent spacing between frames for a cohesive look. A common guideline is to keep 2-4 inches between frames.
- Symmetry vs. Asymmetry: Decide if you want a symmetrical layout (evenly spaced and aligned) or an asymmetrical layout (more relaxed and varied).
4. Hanging Your Artwork
- Height: Hang frames at eye level for the best viewing experience. This is typically about 57-60 inches from the floor to the center of the gallery.
- Tools: Use a level and measuring tape to ensure your artwork is hung straight and evenly spaced. Picture hanging strips can be useful for lightweight pieces and easy adjustments.
5. Add Variety with Decorative Items
- Incorporate Objects: Include decorative items like small shelves, mirrors, or 3D elements to add dimension and interest to the gallery wall.
- Mix Media: Combine framed art with other materials, like woven textiles, small sculptures, or decorative plates.
6. Personalize with Unique Touches
- Photos: Include personal photos that hold special meaning to add a personal touch.
- Quotes: Add inspiring or meaningful quotes in stylish typography to enhance the visual appeal.
7. Maintenance and Updates
- Refresh: Update your gallery wall periodically with new pieces to keep it fresh and interesting.
- Clean: Regularly dust frames and clean any glass surfaces to maintain a polished look.
8. Budget-Friendly Tips
- DIY Frames: Consider DIY-ing your own frames from inexpensive materials or repurposing old ones.
- Printable Art: Find free or low-cost art prints online that you can print and frame yourself.
Examples of Gallery Wall Layouts:
- Grid Style: Arrange frames in a grid pattern for a clean and organized look.
- Salon Style: Create a more eclectic feel by arranging frames in a loose, varied pattern that fills the entire wall.
- Linear Arrangement: Line up frames horizontally or vertically for a streamlined appearance.
A well-curated gallery wall can turn a blank wall into a statement piece of your home, reflecting your personality and style!
6. Lighting Upgrades:
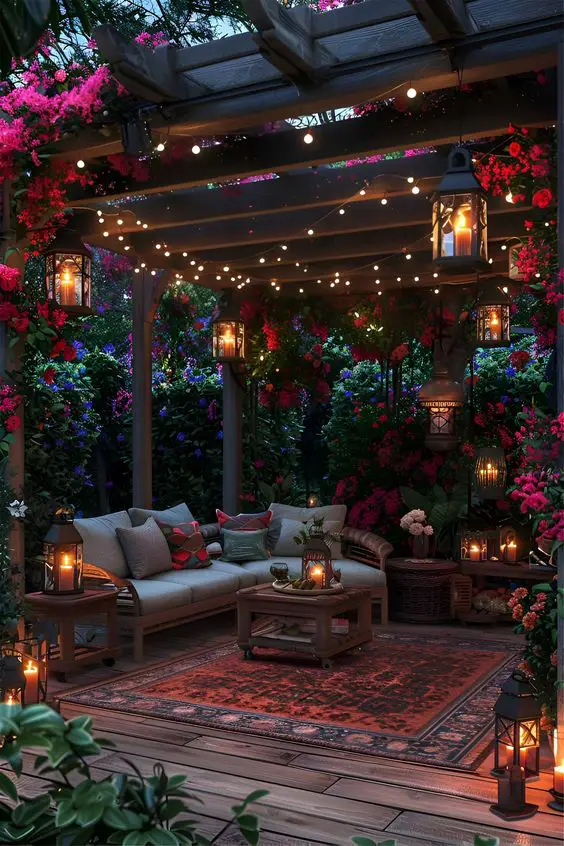
Image :- Pinterest
Upgrading your lighting can dramatically transform the ambiance of a room. Here are some ideas to refresh your lighting with both subtle and impactful changes:
1. Replace Old Fixtures
- Modern Chandeliers: Swap out outdated chandeliers for modern designs that complement your decor. Look for styles that add a touch of elegance or whimsy.
- Sconces: Add or update wall sconces to provide additional lighting and style. They work well in hallways, bedrooms, or beside mirrors.
- Pendant Lights: Install pendant lights over dining areas or kitchen islands for a stylish focal point.
2. Use Dimmer Switches
- Adjustable Lighting: Install dimmer switches to control the brightness of your lights. This allows you to create different moods and adjust the light level based on your needs.
3. Add String Lights
- Cozy Atmosphere: Use string lights to create a warm, inviting atmosphere. Drape them around windows, along walls, or in plants for a magical touch.
- Decorative Options: Choose from a variety of styles, including fairy lights, globe lights, or LED strips, to suit your room’s aesthetic.
4. Incorporate Table and Floor Lamps
- Task Lighting: Add table lamps to desks, nightstands, or reading corners for focused lighting. Choose lamps with adjustable arms or shades for versatility.
- Accent Lighting: Use floor lamps to highlight specific areas or provide additional light. Arc lamps can add a stylish touch while providing overhead illumination.
5. Install Recessed Lighting
- Sleek Design: Recessed lighting, also known as can lights, can provide even, unobtrusive illumination. It’s perfect for modern spaces and can be used to highlight artwork or architectural features.
6. Add Under-Cabinet Lighting
- Functional and Stylish: Install under-cabinet lights in the kitchen or bathroom to illuminate countertops. LED strips or puck lights work well and add a sleek look.
7. Use Smart Lighting
- Remote Control: Invest in smart bulbs or smart plugs that allow you to control your lighting with your smartphone or voice commands.
- Color Options: Smart lights often come with color-changing options, so you can set the mood with different hues.
8. Accent Lighting
- Highlight Features: Use accent lighting to spotlight artwork, plants, or architectural details. Track lighting or adjustable spotlights can help focus light where you need it.
- Backlighting: Add backlighting behind furniture or along architectural features for a dramatic effect.
9. Update Lampshades
- New Look: Refresh old lamps by updating the lampshades. Choose fabrics and colors that complement your decor and add visual interest.
10. Use Light Bulbs Wisely
- Warm vs. Cool: Select light bulbs based on the ambiance you want to create. Warm light bulbs are cozy and inviting, while cool light bulbs are bright and energizing.
- Energy-Efficient: Opt for LED bulbs to save on energy costs and extend the life of your bulbs.
Budget-Friendly Tips:
- DIY Upgrades: Refresh existing fixtures with paint or new decorative elements.
- Shop Sales: Look for lighting fixtures on sale or clearance at home decor stores or online.
- Thrift Stores: Find unique and affordable lighting options at thrift stores or flea markets.
Examples of Lighting Upgrades:
- Industrial Style: Use exposed bulbs and metal fixtures for a trendy, industrial look.
- Farmhouse Charm: Choose fixtures with a vintage or rustic style to add farmhouse charm to your space.
- Contemporary Elegance: Opt for sleek, minimal designs for a modern and sophisticated feel.
Upgrading your lighting can not only enhance the look of your room but also improve functionality and mood. Even small changes can make a big difference!
7. Rug Layering:
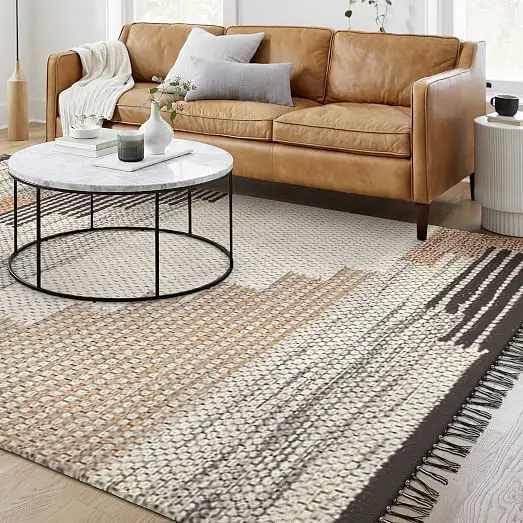
Image :- Pinterest
Layering rugs is a stylish way to add dimension, color, and texture to your space. It can also help delineate different areas in a room, such as a seating area or dining zone. Here’s how to effectively layer rugs:
1. Choose Your Base Rug
- Neutral Foundation: Start with a larger, neutral rug as your base. This rug should cover a substantial area of the room and provide a solid foundation for layering.
- Material: Opt for durable materials like jute, sisal, or wool for the base rug, which will be underfoot and likely receive the most wear.
2. Select Your Top Rugs
- Smaller Rugs: Choose smaller rugs with patterns, colors, or textures to layer on top of the base rug. These rugs can be round, rectangular, or any shape that complements your design.
- Contrast and Complement: Look for rugs that contrast with the base rug in color or pattern to create visual interest. Alternatively, find rugs that complement the base rug to maintain a cohesive look.
3. Arrange the Rugs
- Centered: Place the smaller rug in the center of the larger rug. This works well for defining specific areas like a coffee table or dining table.
- Offset: Position the smaller rug slightly off-center for a more relaxed, eclectic look. This can work well in seating areas or as a feature near the foot of a bed.
- Layered Overlap: Allow the edges of the smaller rug to overlap the base rug for a seamless transition.
4. Consider Patterns and Colors
- Mixing Patterns: When layering rugs with patterns, aim for a mix of different styles—such as geometric with floral or tribal with abstract—to avoid visual overwhelm.
- Color Coordination: Ensure the colors in the top rug complement the base rug. You can use similar hues or choose contrasting colors to create a dynamic look.
5. Define Areas
- Living Area: Use a larger, neutral rug as the base and layer a smaller, patterned rug in front of the sofa or coffee table to create a distinct seating area.
- Dining Area: Layer a patterned rug under the dining table, making sure it’s large enough to accommodate chairs when pulled out.
6. Secure the Rugs
- Non-Slip Pads: Use non-slip rug pads to keep both rugs in place and prevent shifting. This will also add cushioning and protect the floors.
- Anchoring: Ensure the top rug is adequately anchored, especially in high-traffic areas, to avoid tripping hazards.
7. Adjust for Proportions
- Room Size: In smaller rooms, choose rugs that don’t overwhelm the space. Layering smaller rugs on a smaller base can help maintain balance.
- Furniture Placement: Ensure that the rugs are appropriately sized relative to the furniture to maintain proportion and avoid a cluttered look.
8. Layering Tips
- Texture Variety: Mix different textures, such as a plush patterned rug over a flatweave base, to create visual and tactile interest.
- Seasonal Updates: Swap out the top rug with seasonal patterns or colors for a fresh look throughout the year.
Examples of Rug Layering:
- Bohemian Style: A large jute rug as the base with a colorful, patterned Persian rug layered on top.
- Modern Look: A large, neutral area rug with a smaller, geometric-patterned rug layered in a contrasting color.
- Classic Elegance: A large, neutral wool rug with a smaller, vintage-style rug layered in front of a classic sofa.
Layering rugs can add personality and charm to your decor, making the room feel more inviting and visually interesting. Play with combinations until you find a look that suits your style!
8. Decorative Storage:
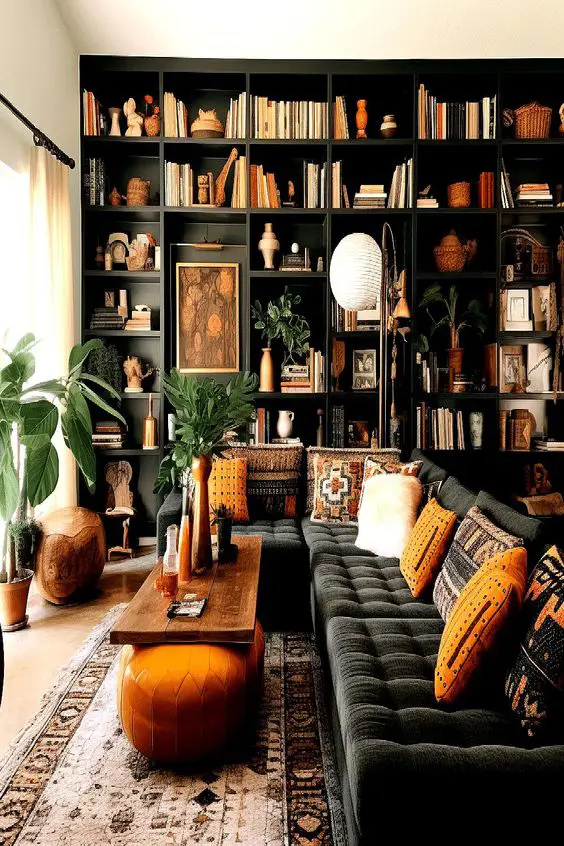
Image :- Pinterest
Decorative storage is a great way to keep your space organized while adding style to your decor. Here are some tips and ideas to make the most of decorative storage solutions:
1. Choose Stylish Containers
- Baskets: Opt for woven baskets in materials like rattan, wicker, or seagrass. They come in various shapes and sizes and can add a natural, textured look to your space.
- Bins: Fabric or leather bins can provide a chic alternative to traditional plastic storage. Look for bins with attractive patterns or colors that complement your decor.
- Boxes: Decorative boxes, whether covered in fabric or patterned paper, can be used to store smaller items and add a touch of elegance.
2. Utilize Different Sizes and Shapes
- Stackable Bins: Use stackable bins to maximize vertical space and create a neat, organized look.
- Variety: Mix and match different sizes and shapes to suit your storage needs and design preferences.
3. Incorporate Storage into Furniture
- Ottomans: Choose ottomans with hidden storage compartments. They can serve as both a functional seating option and a place to store items.
- Coffee Tables: Look for coffee tables with drawers or shelves for concealed storage.
- Benches: Storage benches provide seating as well as space to store items like blankets, shoes, or toys.
4. Add Storage to Wall Decor
- Shelving Units: Use floating shelves or built-in units to display decorative baskets or boxes. This can keep frequently used items within reach while enhancing your room’s decor.
- Hooks and Racks: Install hooks or racks for hanging baskets or bins. This can be particularly useful in entryways or mudrooms.
5. Organize by Room
- Living Room: Use decorative baskets for magazines, remote controls, or toys. Store blankets or extra pillows in stylish bins or ottomans.
- Bedroom: Utilize fabric bins or decorative boxes for clothing, accessories, or personal items. Consider under-bed storage for seasonal items.
- Office: Organize office supplies, paperwork, or electronics in stylish boxes or baskets that fit with your desk decor.
- Bathroom: Use decorative trays, bins, or jars to keep toiletries organized and within easy reach.
6. Color and Pattern Coordination
- Coordinate with Decor: Choose storage solutions that match or complement the room’s color scheme and decor style. This helps the storage blend seamlessly with the overall design.
- Accent Pieces: Use storage pieces as accent elements by choosing colors or patterns that pop or create a focal point.
7. Labeling
- Labels: Add stylish labels to bins and boxes for easy identification. Choose labels that match your decor, such as chalkboard tags or elegant script.
8. DIY Storage Solutions
- Personal Touch: Customize storage containers with paint, fabric, or decorative paper to match your style.
- Repurpose: Transform items like wooden crates or old suitcases into decorative storage solutions with a bit of creativity.
Examples of Decorative Storage Solutions:
- Entryway: Woven baskets for shoes, a coat rack with decorative hooks, and a storage bench for mail and keys.
- Living Room: A stylish trunk as a coffee table with hidden storage, and decorative baskets on shelves for magazines and blankets.
- Bedroom: A storage bench at the foot of the bed, fabric bins on closet shelves, and decorative boxes on nightstands for small items.
Incorporating decorative storage not only helps keep your space organized but also enhances the overall aesthetic of your home. With a bit of creativity, you can find stylish solutions that fit both your functional needs and design preferences.
9. Window Treatments:
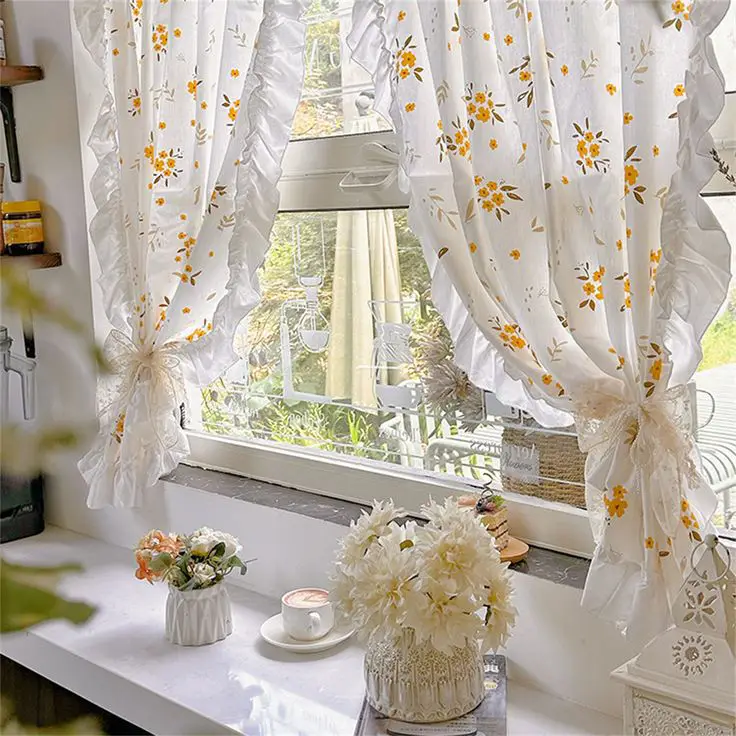
Image :- Pinterest
Updating window treatments is an effective and budget-friendly way to refresh the look of any room. Here are some ideas and tips for transforming your windows with curtains, shades, and other treatments:
1. Curtain Panels
- Inexpensive Options: Look for affordable curtain panels at discount stores, online retailers, or even thrift shops. Many stores offer stylish options without breaking the bank.
- Fabric Choices: Choose fabrics based on the look and function you want. Light, airy fabrics like linen or sheer cotton are great for a breezy, casual look, while heavier fabrics like velvet or thermal-lined curtains can add warmth and privacy.
- Patterns and Colors: Select patterns and colors that complement your room’s decor. Bold patterns or bright colors can make a statement, while neutral tones offer a classic look.
2. DIY Roman Shades
- Simple Design: Roman shades are relatively easy to make with basic sewing skills. You can use fabric of your choice and follow online tutorials for a custom fit.
- Materials Needed: You’ll need fabric, a shade kit (or materials to make your own, like wooden dowels), adhesive, and a sewing machine.
- Customization: Customize the shades with fabric that matches your decor. Add trims or embellishments for a personalized touch.
3. Use Curtain Rings and Hooks
- Stylish Hardware: Update your curtain hardware with decorative rings and hooks. This can change the look of your curtains and add an extra design element.
- Ease of Use: Curtain rings and hooks make it easy to switch out curtains or adjust their position.
4. Layered Treatments
- Combine Layers: Layer curtains with sheer panels for added versatility. You can use sheers during the day for light and privacy, and add heavier curtains in the evening for darkness and insulation.
- Valances: Add a valance over your curtains for a polished look. Valances can also be used alone for a simpler treatment.
5. DIY Alternatives
- No-Sew Options: If you’re not into sewing, consider no-sew curtain options like fabric glue or adhesive strips.
- Fabric Swags: Use fabric swags for a simple, elegant look. This involves draping a piece of fabric over a curtain rod and letting it fall naturally.
6. Install a New Rod
- Decorative Rods: Update your curtain rod to a more decorative style. Look for rods with interesting finials or unique designs to enhance the overall look of your window treatments.
- Adjustable Rods: Consider adjustable rods for flexibility in different window sizes or styles.
7. Window Film
- Privacy and Style: Use window film to add privacy or decorative patterns. This is a great alternative if you don’t want to use traditional curtains.
- Easy Application: Window film is easy to apply and remove, making it a flexible option for temporary updates.
8. Functional Treatments
- Blackout Curtains: For bedrooms or media rooms, consider blackout curtains that block out light and provide added privacy.
- Thermal Curtains: If you’re looking for energy efficiency, thermal curtains help insulate your windows and reduce heating or cooling costs.
9. Roman Shades and Blinds
- Ready-Made Options: Many stores offer affordable ready-made roman shades and blinds in various patterns and colors.
- Adjustable Blinds: Consider adjustable blinds for ease of use and versatility in light control.
10. Easy Updates
- Curtain Tiebacks: Add decorative tiebacks to hold your curtains open and enhance their appearance.
- Layered Curtains: For a fuller look, layer multiple curtain panels or use different types of curtains together.
Examples of Window Treatments:
- Living Room: Sheer white curtains layered over heavy, patterned drapes for an elegant and flexible look.
- Bedroom: DIY roman shades in a cozy, neutral fabric paired with blackout curtains for better sleep quality.
- Kitchen: Simple, bright curtain panels or a fabric valance for a fresh and airy feel.
By updating your window treatments, you can add color, texture, and style to your space while also improving functionality and comfort.
10. Accent Walls:
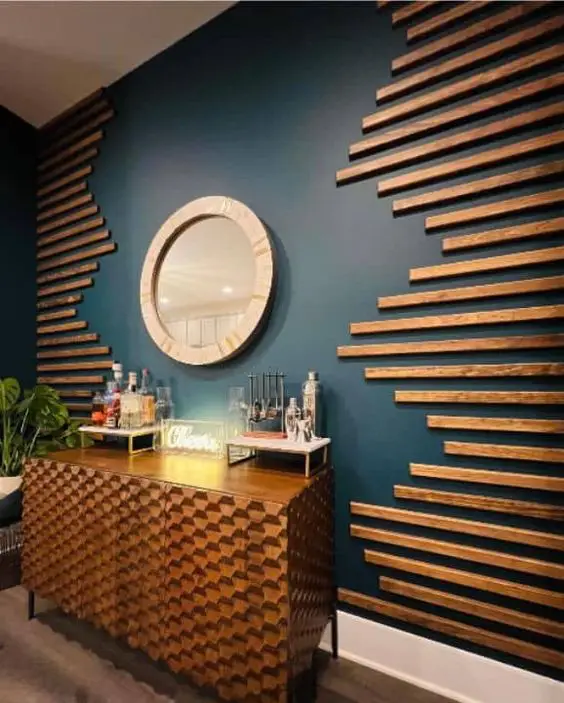
Image :- Pinterest
Creating an accent wall is a great way to add visual interest and personality to a room without a major overhaul. Here’s how you can effectively use removable wallpaper, peel-and-stick tiles, or paint to create a stunning accent wall:
1. Removable Wallpaper
- Easy Application: Removable wallpaper is perfect for renters or those who like to change their decor frequently. It’s easy to apply and remove without damaging the wall.
- Patterns and Textures: Choose from a wide variety of patterns, textures, and colors. Options range from bold geometric patterns to subtle textures.
- Installation Tips: Clean the wall before applying to ensure a smooth finish. Start from the top and work your way down, smoothing out air bubbles as you go.
2. Peel-and-Stick Tiles
- Versatility: Peel-and-stick tiles can be used not only on walls but also as a backsplash in kitchens or bathrooms. They come in various designs, including subway tiles, mosaics, and more.
- Easy Maintenance: They are generally easy to clean and maintain. They’re also removable, making them a great choice for temporary updates.
- Application Tips: Measure and cut tiles as needed. Start from the center or a corner and work your way out, ensuring the tiles are aligned properly.
3. Fresh Coat of Paint
- Color Pop: Use a bold or contrasting color to create a striking accent wall. Choose a color that complements the rest of the room’s decor.
- Techniques: Consider different painting techniques, such as ombre or geometric patterns, for a unique look.
- Preparation: Tape off edges and use a primer if needed. Ensure the wall is clean and dry before painting for the best results.
4. Stenciling
- Custom Patterns: Stenciling allows you to create custom patterns or designs on your accent wall. You can use stencils to add intricate designs or simple geometric shapes.
- Application: Use painter’s tape to secure the stencil and apply paint with a brush or sponge. Remove the stencil carefully while the paint is still wet for clean edges.
5. Wood Panels or Shiplap
- Textural Interest: Wood panels or shiplap can add texture and warmth to your space. They’re available in pre-painted or natural finishes.
- DIY Installation: For a budget-friendly option, consider DIY installation. Attach panels to the wall using adhesive or nails, and finish with paint or stain.
6. Fabric Wall Hangings
- Soft Texture: Use large pieces of fabric or fabric panels to create a soft, textured accent wall. This can add warmth and a unique touch to your decor.
- Mounting: Hang fabric using a curtain rod, tension rod, or adhesive hooks. Ensure the fabric is smooth and properly secured.
7. Wall Decals
- Easy and Removable: Wall decals are a great way to add decorative elements without committing to a permanent change. They’re available in various designs, including quotes, patterns, and shapes.
- Placement: Apply decals to a clean, smooth surface. They can be repositioned if needed.
8. Mirrors and Art
- Reflective Accents: Large mirrors or a gallery of framed art can serve as an accent wall, adding depth and visual interest.
- Arrangement: Arrange mirrors or art pieces in a cohesive pattern to create a focal point.
9. Brick or Stone Veneer
- Rustic Charm: Faux brick or stone veneer can add a rustic or industrial feel to your accent wall. It’s available in various finishes and can be applied with adhesive.
- Installation: Follow the manufacturer’s instructions for installation to ensure a secure and seamless look.
10. Budget-Friendly Tips
- Sample Sizes: Purchase sample sizes of paint or wallpaper to test colors and patterns before committing to larger quantities.
- Sales and Discounts: Look for sales or discounts on wallpaper, tiles, or paint at home improvement stores.
Examples of Accent Walls:
- Living Room: A bold navy blue paint on one wall behind a sofa to create a dramatic focal point.
- Bedroom: Removable wallpaper with a subtle floral pattern on the wall behind the bed for a cozy, stylish look.
- Kitchen: Peel-and-stick tiles with a mosaic design as a backsplash behind the countertop for a fresh update.
Accent walls offer a simple and effective way to enhance your space with style and personality. Choose the option that best fits your budget, design preferences, and DIY skills!
